Kitchen tasks place persistent physical demands on the musculoskeletal system. Meal preparation and cleanup often require prolonged standing, sustained forward head tilt, repetitive grip exertion, and awkward trunk flexion over rigid work surfaces. For older adults or anyone managing reduced mobility, joint stiffness, or balance concerns, these physical stressors compound quickly. Muscular fatigue sets in rapidly, joint friction increases, and the risk of slips, trips, or loss of balance rises during routine daily cooking.
Most residential kitchens are constructed to standard builder dimensions rather than the user's specific anatomical proportions. Countertops typically sit at a uniform 36 inches off the floor, sinks are recessed deep into cabinetry, and heavy cookware is routinely stored below knee level. Adapting your kitchen workspace through ergonomic adjustments helps preserve physical energy, protects the spine, and reduces fall hazards. Practical adjustments to working heights, grip surfaces, body mechanics, and cabinet organization create a functional space that supports long-term independence.
Determining Proper Counter Height for Chopping Tasks
Standard kitchen counters stand 36 inches high from the finished floor. While this dimension serves an average height range during brief tasks, it rarely suits individual bodies during extended food preparation like slicing, dicing, and deboning. To find your ideal prep height, stand upright in your regular kitchen footwear with your shoulders relaxed and your elbows bent at a 90-degree angle. Measure the vertical distance from the floor to the crease of your elbow. For heavy chopping that requires downward leverage, the top of your cutting surface should sit 3 to 5 inches below your elbow crease. For light, detailed peeling or trimming, a surface 2 to 3 inches below the elbow crease prevents neck fatigue.
When a counter surface is too low, the cook inevitably hunches forward. This posture curves the thoracic spine and places continuous tensile strain on the lumbar extensor muscles. Conversely, a preparation surface that is too high forces you to shrug your shoulders upward, placing the upper trapezius and levator scapulae muscles into a sustained contraction while reducing your natural leverage over the knife blade.
| User Height | Approximate Elbow Height | Ideal Chopping Surface Height | Recommended Adjustment |
|---|---|---|---|
| 5 feet 0 inches to 5 feet 3 inches | 35 to 37 inches | 31 to 33 inches | Work at a 30-inch dining table or use a seated prep station. |
| 5 feet 4 inches to 5 feet 8 inches | 38 to 41 inches | 34 to 36 inches | Use a standard 36-inch counter with a slim 0.5-inch cutting board. |
| 5 feet 9 inches to 6 feet 1 inch | 42 to 45 inches | 38 to 41 inches | Add a 2-inch to 4-inch thick butcher block riser board on the counter. |
| 6 feet 2 inches and taller | 46 to 49 inches | 42 to 44 inches | Use a tall prep block or counter risers under heavy cutting blocks. |
If your counter is too low, you do not need an expensive structural remodel. You can raise the chopping plane by using thick end-grain hardwood butcher blocks. Solid boards measuring 2 to 3.5 inches in thickness add immediate height and stability. You can place rigid rubber furniture risers or a non-slip silicone mat beneath the cutting board corners to increase the height by another inch. If your counters are too high, transfer cutting tasks to a sturdy dining table, which typically stands at 28 to 30 inches, or complete chopping while seated on an adjustable kitchen stool with a supportive foot ring.
Using Dense Foam Anti-Fatigue Mats at the Sink
Standing on unyielding kitchen flooring such as ceramic tile, natural stone, or engineered hardwood forces the foot arches, calf muscles, and lower back into static muscular contraction. This lack of movement impedes venous blood return to the heart, which speeds up leg fatigue and places compressive stress on the lumbar joints. Placing an anti-fatigue mat in high-use areas such as the sink or primary prep station provides targeted cushioning that promotes subtle, continuous calf contraction, aiding circulation and easing spinal pressure.
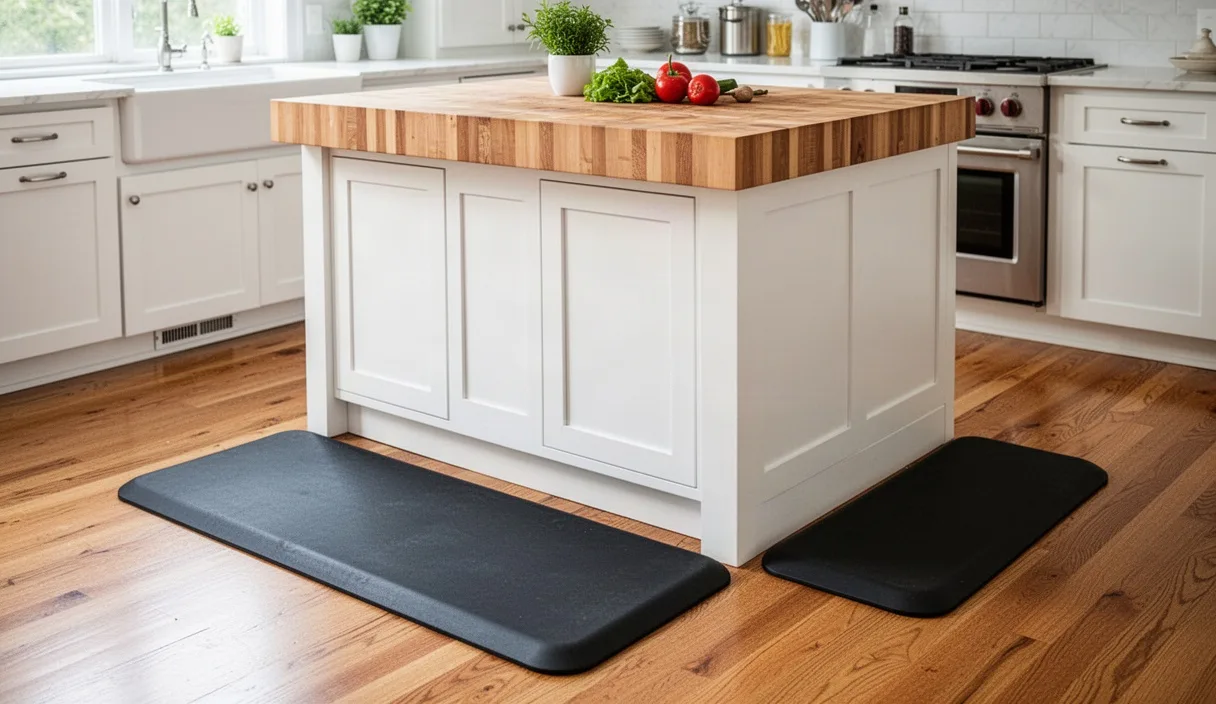
However, choosing the wrong floor mat creates a serious trip and fall hazard, especially for individuals who walk with a shuffling gait or use mobility aids. Mats made from soft, pillowy memory foam compress completely to the floor under body weight, offering little shock absorption while creating an uneven, unstable surface that challenges balance. Select high-density polyurethane or composite rubber mats measuring between 0.75 inches and 0.875 inches in thickness. High-density cores compress just enough to reduce joint loading while remaining firm enough to support stable, confident foot placement.
Edge design is critical for fall prevention. Any mat placed in a residential kitchen must have integral beveled edges with an angle of 20 degrees or less. The edge must rest flat against the surrounding floor without curling, ripples, or raised borders that can catch a shoe toe or walker tip. The bottom surface must feature a high-traction, textured backing designed to grip smooth tile or polished floor finishes without shifting under lateral force. Inspect the mat monthly; if the edges warp upward or grease spills degrade the rubber backing, discard and replace the mat promptly.
Selecting Balanced Chef Knives and Wide-Grip Peeler Tools
Manual food preparation requires repetitive wrist extension, radial deviation, and continuous finger pinching. Standard cutlery fitted with narrow, slick plastic or polished wooden handles demands high grip pressure to keep the tool from twisting. This sustained grip increases fluid pressure within the carpal tunnel and strains the flexor tendons of the forearm. Joint-sparing tools reduce the muscular force needed to execute everyday kitchen prep.
A well-balanced 8-inch chef knife should balance cleanly near the bolster, which is the thick junction where the blade joins the handle. Full-tang construction, where the steel of the blade runs continuously through the entire length of the handle, provides a counterweight that balances the tool. This balance allows the weight of the knife to drive the cut, sparing your hand muscles from having to force the blade down. Grip the knife using a modified pinch grip, placing the thumb and the index finger against the base of the blade while wrapping the remaining fingers lightly around the handle. Maintain a sharp edge using a whetstone or professional sharpening service every three to four months. A dull blade requires four times more downward force than a sharp blade, increasing both joint strain and the risk of a dangerous blade slip.
For skinning produce, replace traditional straight peelers with horizontal Y-shaped peelers equipped with wide, ribbed handles. Traditional swivel peelers require continuous pronation of the forearm and awkward wrist flicking. In contrast, a Y-peeler engages the larger, stronger muscles of the upper arm and shoulder, keeping the wrist locked in a safe, neutral alignment. Look for handle diameters of 1.25 to 1.5 inches covered in textured thermoplastic elastomers, which provide high friction even when hands are wet or greasy. Cooks managing hand joint mobility can also slide closed-cell foam tubing over existing utensil handles to enlarge the grip radius and minimize joint compression.
Body Positioning to Avoid Slouching While Washing Dishes
Cleaning cookware at the sink frequently leads to acute lower back aches. Standard sink basins sit 8 to 10 inches below the countertop, which forces the user to lean forward at a 15 to 25 degree angle while working with outstretched arms. This sustained forward posture doubles the compressive mechanical load on the lumbar intervertebral discs compared to standing completely upright, while placing heavy demands on the posterior spinal ligaments.
To reduce lumbar strain while washing dishes, use a staggered-stance position with pelvic support:
- Open the cabinet doors directly below the sink basin to expose the interior base shelf.
- Place one foot inside the cabinet, resting it on the cabinet floor or on a sturdy 4-inch wooden step block.
- Resting one foot higher than the other flexes that hip, which tilts the pelvis backward and flattens the lumbar curve, taking pressure off the lower spine muscles.
- Alternate your resting foot every 6 to 8 minutes during longer cleanup tasks to balance muscular loading across both sides of the pelvis.
- Bring your hips forward until your lower abdomen lightly touches the front face of the sink counter to bring your center of mass closer to the water stream.
Avoid twisting your spine when transferring wet items from the basin to a drying rack. Twisting under load produces shear forces across spinal discs. Instead, keep the drying rack immediately adjacent to the sink basin, and move your feet to turn your entire body toward the rack rather than twisting your torso. If the sink basin is exceptionally deep, place an inverted plastic washbasin or a stainless steel sink grid at the bottom of the sink to raise your washing plane by 2 to 3 inches.
Arranging Lower Cabinets to Minimize Heavy Bending
Deep lower base cabinets are a significant source of joint pain and balance disruptions. Standard lower cabinets are 24 inches deep, which forces individuals to squat deeply, drop to their knees, or bend forward at the waist while reaching into dark rear shelving. For individuals with reduced balance, knee joint mobility, or hip replacements, lifting an 8-pound cast-iron pan or slow cooker out of a low, deep shelf creates severe spinal loading and challenges physical stability.
Organize kitchen equipment using dedicated storage zones based on frequency of use and physical effort:
- Identify the primary zone: The space between mid-thigh height and chest height is your primary work zone. Store all frequently used items here, including daily cookware, chef knives, common spices, dinner plates, and cutting boards.
- Evaluate current lower cabinet contents: Remove heavy, infrequently used appliances from floor-level shelving. Store these appliances on an open pantry shelf or directly on unused counter space.
- Install full-extension slide-out hardware: Retrofit deep base cabinets with steel ball-bearing sliding shelves or wire pull-out baskets. These units roll completely out of the cabinet with minimal pulling force, allowing you to lift pots vertically without reaching awkwardly into deep shelving.
- Repurpose remaining low storage: Use floor-level shelves exclusively for lightweight, unbreakable supplies such as paper towels, plastic food storage containers, or dry boxed goods stored in handled bins.
When you must lift an item from a lower shelf, apply strict lifting mechanics. Stand directly facing the cabinet with your feet spread shoulder-width apart to create a broad, stable base of support. Hinge deeply at your hips and bend your knees rather than rounding your back. Draw the object close to your chest before standing up, driving through your heels and using the strength of your quadriceps and gluteal muscles rather than your lower back.
Common mistakes
- Wearing soft, unsupportive slippers: Standing on hard floors in loose, backless, or plush footwear deprives the feet of arch support and creates a serious trip hazard. Wear supportive, closed-toe shoes with slip-resistant soles.
- Using ultra-thick memory foam floor mats: Mats that are excessively soft create an uneven, unstable surface that can catch the toes and challenge stability. Choose dense, firm polyurethane mats with flat beveled edges.
- Tolerating dull cutlery: Working with dull knives forces you to push down with excessive upper-body weight, which strains the wrists and increases the chance of slipping.
- Reaching into deep lower cabinets without support: Bending deeply at the waist to lift heavy Dutch ovens or appliances places excessive stress on the lumbar spine and can lead to loss of balance.
- Working through physical discomfort: Ignoring minor neck stiffness, shoulder pinching, or lower back twinges leads to chronic inflammation and rapid fatigue. Take brief posture breaks every 15 minutes.
Practical Next Steps for Kitchen Ergonomics
Begin by assessing your most common kitchen workstation. Grab a tape measure, put on your typical kitchen shoes, and measure your elbow height to see how your current cutting board setup compares to the recommended 3 to 5 inches below the elbow crease. If your chopping board sits too low, introduce a thick wood riser board this week to correct your posture.
Next, evaluate the safety of your flooring and base cabinets. If you stand on bare tile at the sink, introduce a firm, beveled anti-fatigue mat, and open the lower cabinet door to try resting one foot on an interior block during your next dishwashing session. Audit your lower cabinets to move heavy cast iron, stoneware, and appliances into the zone between your thighs and chest. If you experience persistent balance issues, flexibility & mobility, or numbness in your hands during daily kitchen prep, arrange an in-home evaluation with an occupational therapist or physical therapist for a personalized assessment tailored to your physical needs.