Food spoilage in domestic kitchens is largely an unseen battle against fungi, bacteria, and enzymatic breakdown. Microscopic mold spores exist naturally on the surfaces of fresh produce, inside pantry cabinets, and in ambient air. When these spores encounter available moisture, mild temperatures, and accessible organic matter, they germinate rapidly. A fungal colony can establish mycelial threads deep into the cellular structure of food long before surface fuzz becomes visible to the naked eye. At the same time, ambient bacteria multiply, breaking down pectins and proteins, which produces undesirable textures, sour odors, and bitter flavors.
Controlling these biological processes requires more than simply moving groceries into cold storage. Domestic refrigerators are dynamic thermal environments with significant temperature stratification, fluctuating relative humidity, and varying levels of air circulation. Preventing premature decay involves understanding how storage vessels interact with food chemistry, how ambient moisture influences cellular decay, and how microclimates within your appliances either suppress or accelerate microbial proliferation. Applying systematic storage protocols keeps food fresh longer, preserves nutritional density, and minimizes kitchen waste.
Calibrating Temperature Variations Across Fridge Shelves
Domestic refrigerators do not maintain a uniform temperature throughout their internal volume. Cold air sinks, warm air rises, and the continuous cycling of the cooling compressor creates a gradient of microclimates. Most home units operate best when calibrated between 35 degrees Fahrenheit (1.7 degrees Celsius) and 38 degrees Fahrenheit (3.3 degrees Celsius). Once the internal ambient air rises past 40 degrees Fahrenheit (4.4 degrees Celsius), psychrotrophic bacteria such as Listeria monocytogenes multiply at an accelerated rate, and mold growth accelerates across moist surfaces.
The upper shelves maintain the most stable, moderate temperatures because they sit away from the compressor's direct blast but above the coldest floor basin. This zone is suited for prepared foods, leftovers, cooked meats, pasteurized dairy items, and ready-to-eat products that require consistent chill without the risk of accidental freezing. Keep items in this area sealed tightly to prevent odor migration and surface desiccation caused by internal circulation fans.
The lowest shelves represent the coldest zone inside the appliance, typically sitting between 34 and 36 degrees Fahrenheit. This area should be reserved for raw animal proteins, including poultry, ground beef, and whole fish. Keeping raw meats on the lowest shelf serves two functions: the lower temperature slows microbial replication on highly perishable muscle tissue, and the placement prevents accidental drippings of liquid containing pathogens like Salmonella or Campylobacter from contaminating foods stored below.
The door bins endure the most extreme temperature fluctuations in the entire unit. Every time the door opens, warm kitchen air rushes over these narrow shelves, often pushing the local temperature above 45 degrees Fahrenheit for minutes at a time. Never store fresh milk, farm eggs, or soft cheeses in the door. Restrict door storage to high-acid condiments, pasteurized juices, vinegar-based pickles, and shelf-stable sauces whose preservative chemistry tolerates intermittent thermal disruption.
| Refrigerator Zone | Average Temperature | Recommended Food Types | Foods to Avoid Storing Here |
|---|---|---|---|
| Top Shelves | 37 to 39 degrees F | Leftovers, deli meats, yogurt, drinks | Raw poultry, raw ground meats |
| Middle Shelves | 36 to 38 degrees F | Eggs, hard cheeses, butter | Condiments with long shelf lives |
| Bottom Shelf | 34 to 36 degrees F | Raw chicken, beef, pork, fresh fish | Ready-to-eat meals, fresh berries |
| Door Bins | 40 to 45 degrees F | Mustard, hot sauces, soy sauce, pickles | Fresh milk, cream, raw meats, eggs |
Selecting Glass Storage Containers Over Porous Plastics
The choice of storage vessel directly dictates how long food remains free of microbial spoilage. Consumer plastics like polypropylene, low-density polyethylene, and recycled resins are chemically porous on a microscopic scale. Over repeated dishwashing cycles and heating events, plastic containers develop micro-fissures, chemical crazing, and surface abrasions. These microscopic crevices trap food lipids, fat-soluble flavor compounds, and fungal spores that standard dish soap cannot fully dislodge. As a result, plastic containers often impart off-flavors and cross-contaminate newly stored batches with lingering spores.
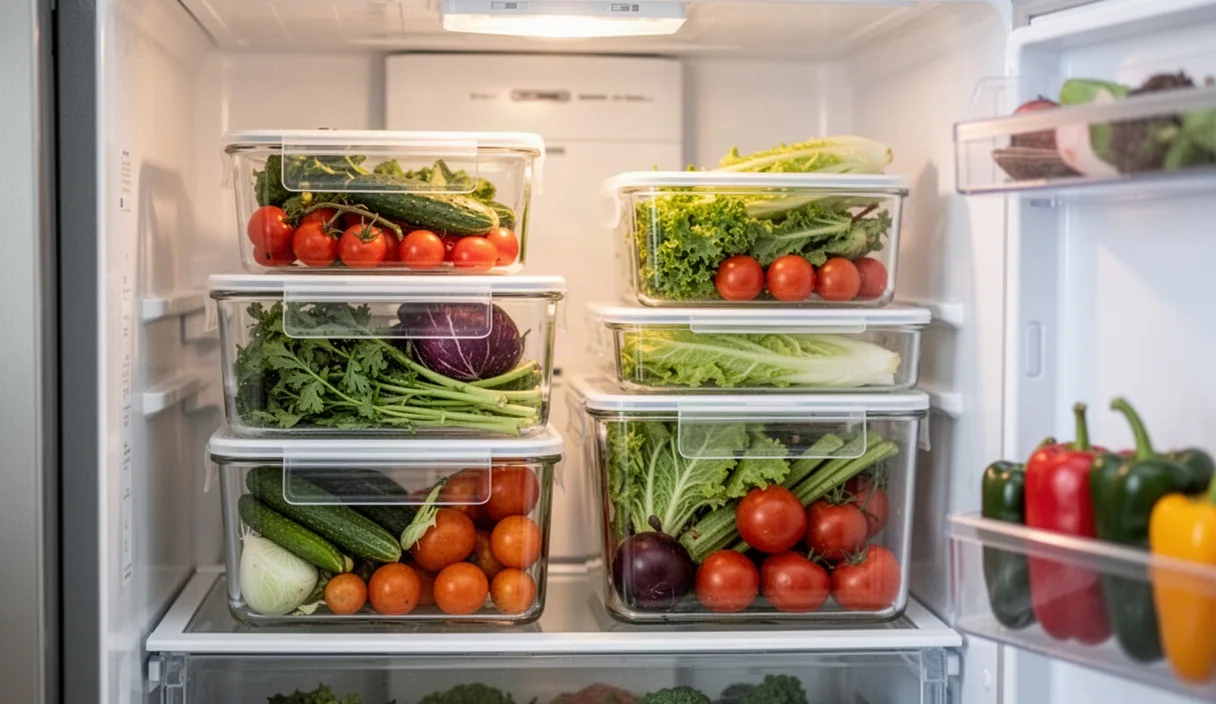
Borosilicate and soda-lime glass containers provide an impermeable, non-reactive barrier against environmental contaminants. Glass surfaces do not harbor microscopic pits from normal sponge cleaning, nor do they degrade when exposed to acidic marinades, tomato-based sauces, or high-salinity brines. Furthermore, glass possesses a higher thermal mass than thin plastic. Once chilled, a glass container acts as a thermal buffer, shielding its contents from transient warm air whenever the refrigerator door opens.
Container lids require equal scrutiny. Clear lids fitted with removable, vulcanized silicone gaskets create an airtight perimeter seal that restricts atmospheric oxygen transfer. Reducing the continuous replenishment of oxygen inside the container slows down oxidative rancidity in cooking fats and denies obligate aerobic molds the gas exchange required to colonize food surfaces. When cleaning, remove the silicone gasket periodically to sanitize the inner channel, as trapped steam condensation can turn that recess into a hidden harbor for black mold colonies.
Managing Humidity Sliders in Produce Drawers
Most modern refrigerators feature crisper drawers equipped with mechanical vent sliders. These sliders do not actively pump moisture into or out of the compartment. Instead, they control air exchange with the main refrigerator cavity. Adjusting these vents balances the loss of natural plant moisture against the dangerous buildup of ambient condensation and ethylene gas.
Closing the slider completely creates a high-humidity environment. When the vent is shut, natural water vapor transpiring from plant tissues remains trapped inside the drawer, keeping the relative humidity elevated. This microclimate is required for produce that wilts when exposed to moving, dry air. Thin-skinned, water-dense plants lose cell turgor rapidly if their moisture evaporates into the general refrigerator space.
Produce suited for closed-vent, high-humidity storage includes:
- Leafy brassicas, including kale, collard greens, and cabbage.
- Root vegetables with their greens removed, such as carrots, radishes, and beets.
- Stem vegetables, including celery, asparagus, and scallions.
- Delicate greens, such as spinach, arugula, and tender salad mixes.
- Cruciferous vegetables, like broccoli, cauliflower, and Romanesco.
Opening the slider creates a low-humidity, high-airflow environment. When the vent is open, moist air and volatile gases vent out into the main refrigerator compartment where the circulating fan can dissipate them. This setting prevents condensation droplets from gathering on plant surfaces, which is the primary catalyst for soft rot and mold germination. It also allows ethylene gas, an organic plant hormone emitted by certain ripening crops, to escape before it accelerates decay in adjacent items.
Produce suited for open-vent, low-humidity storage includes:
- Apples, pears, and quinces.
- Stone fruits, such as plums, peaches, and nectarines.
- Cantaloupes, honeydew melons, and figs.
- Citrus fruits intended for long-term storage rather than immediate countertop use.
- Mushrooms, which require continuous dry airflow to prevent bacterial slime formation.
Washing and Drying Leafy Greens to Delay Wilting
Leafy greens decay through two distinct mechanisms: biological digestion by epiphytic bacteria and physical tissue collapse caused by water loss. When greens are harvested, their leaf surfaces carry soil residues, yeast cells, and bacteria such as Pseudomonas fluorescens. Simply placing unwashed field greens into a sealed container locks these organisms against the leaf surface. Conversely, storing soaked greens leads to rapid rotting, as free surface liquid blocks natural gas exchange and turns leaf tissue into mush.
Extending the storage window of greens requires removing field grime without saturating the plant tissues long term. Follow this systematic preparation routine before placing greens into cold storage:
- Submerge in chilled water: Fill a clean prep basin with cold tap water around 50 degrees Fahrenheit. Submerge the un-chopped greens and agitate them gently with your hands for 45 seconds. This dislodges abrasive mineral soil and transient fungal spores without bruising the delicate leaf margins.
- Drain through buoyancy: Lift the greens upward out of the water rather than pouring the basin through a colander. Lifting allows heavy grit, sand, and particulate debris to settle to the bottom of the basin instead of filtering back over the leaves.
- Centrifuge out surface water: Place the leaves loosely into a manual salad spinner. Spin them vigorously in two separate 20-second bursts, emptying the expelled water from the outer bowl between cycles. Centrifugal force pulls water out of leaf folds without crushing fragile vascular structures.
- Air dry on lint-free cloth: Spread the spun greens across clean, unbleached cotton flour-sack towels or heavy paper towels for roughly 15 minutes. The goal is removing glistening droplets while avoiding prolonged exposure that causes the leaves to wilt.
- Layer with moisture buffers: Place the dry leaves into a rigid, clear container lined at the bottom, middle, and top with dry paper towels or clean linen. The cloth captures excess transpirational moisture as the greens breathe, keeping liquid water off the leaf cuticle while maintaining atmospheric humidity.
Identifying and Isolating Early Spoilage in Stored Food
Mold spores disperse through the air with microscopic ease, and fungal hyphae can travel between touching food items within hours. Identifying early warning indicators of decomposition allows you to salvage partially affected supplies and sanitize the immediate environment before contamination spreads across an entire crisper drawer or pantry bin.
Visual inspection reveals primary signs of breakdown before full sporulation occurs. Look for subtle epidermal softening, dull patches on previously glossy skins, water-soaked lesions, or a translucent appearance along leaf veins. On hard produce like carrots, sweet potatoes, or winter squash, early spoilage manifests as localized sunken pits or circular discolored rings. On soft berries, look for a dulling of surface color, followed by small areas where the skin collapses under its own juice.
Tactile and olfactory cues provide reliable secondary confirmation. Bacterial breakdown yields distinct volatile organic compounds, including putrescine, cadaverine, and sulfurous gases. A sharp, sour, or overly sweet alcoholic scent indicates active yeast fermentation or anaerobic bacterial decomposition. Structurally, any slimy coating on celery stalks, bell pepper shoulders, or leafy greens means bacterial biofilm has dissolved the outer protective epidermis; these items must be separated immediately from sound produce.
Managing spoiled foods depends directly on moisture content and food density. The United States Department of Agriculture provides clear guidance on trimming mold versus discarding items entirely:
- Dense, low-moisture foods: Firm vegetables like carrots, cabbage, bell peppers, and hard block cheeses (such as Cheddar, Gouda, or Parmesan) can be salvaged if mold appears. Cut off at least 1 inch around and below the mold spot using a clean paring knife. Do not allow the blade to touch the mold itself, as this drags spores into the clean interior tissue.
- Porous, high-moisture foods: Soft fruits, cooked casseroles, deli meats, soft cheeses (like ricotta, cottage cheese, or chevre), breads, jams, and cooked grains must be discarded completely if mold appears. In high-moisture matrices, invisible fungal threads (mycelia) and associated mycotoxins penetrate inches beyond the surface colony, making partial salvage unsafe.
- Immediate sanitization: Once an infected item is removed, immediately clean the shelf, drawer, or container that held it. Spray the surface with a solution of 1 tablespoon of unscented household bleach diluted in 1 gallon of water, or thoroughly wipe with 70 percent isopropyl alcohol. Allow the disinfectant to sit for 5 minutes before wiping clean and drying completely.
Common Mistakes
Even well-intentioned food preservation efforts can fail due to a few common procedural errors. Correcting these habits reduces ambient mold counts and prevents structural food decay.
Packing shelves to capacity is a frequent mistake. Refrigeration works by moving cold air continuously over exposed surfaces. When containers, jars, and produce bags are shoved tightly against each other or stacked directly against the rear cooling plate, air circulation stops. This creates warm pockets where temperatures can drift past 42 degrees Fahrenheit, accelerating mold growth while simultaneously freezing produce pushed directly against the cold back wall.
Storing raw potatoes and dry onions together in an enclosed bin causes premature rot. Onions continuously emit moderate levels of ethylene gas, which triggers cell division and sprouting in unpeeled potatoes. Concurrently, potatoes transpire moisture, raising the ambient humidity around the onions and encouraging black mold (Aspergillus niger) to colonize the dry outer onion skins. Keep these two staples separated in cool, dark, well-ventilated locations with low ambient humidity.
Washing fresh berries days before consumption almost guarantees mold loss. Raspberries, blackberries, and strawberries possess delicate skins coated with wild fungal spores. Introducing water days ahead fills the microscopic pores of the fruit with moisture that cannot easily evaporate. Store fresh berries unwashed in their ventilated containers with a dry paper towel placed under the bottom layer to capture leaks. Wash berries under cold running water only in the minutes immediately preceding consumption.
Next Steps for an Organized, Mold-Free Kitchen
To reduce spoilage permanently, establish a simple baseline routine for your kitchen storage. Begin by purchasing an independent, dial or digital refrigerator thermometer. Built-in appliance thermostats register internal mechanical settings rather than real air temperature. Place the independent gauge on the middle shelf for 24 hours to confirm your appliance runs between 35 and 38 degrees Fahrenheit, and adjust your controls accordingly.
Next, audit your storage containers. Gradually replace scratched, cloudy plastic tubs with clear glass vessels paired with locking, gasketed lids. Reserve clean cotton towels or unbleached paper towels exclusively for produce storage to ensure you always have moisture-buffering materials ready after grocery shopping.
Finally, institute a weekly rotation schedule. Dedicate 5 minutes directly before your primary grocery trip to scan crisper drawers and lower shelves. Move older items to the front, discard anything showing structural softness or odor, and wipe down drawer bottoms where liquid condensation settles. Consistent management of temperature, air movement, and moisture will keep your fresh food wholesome and safe week after week.